Pi-hole

Network Privacy
Project Overview
The Pi-Hole is a Linux network-level advertisement and internet tracker blocking application intended for use on a private network. The computer hardware is traditionally low cost, and runs on a credit card sized computer called a Raspberry Pi.  The image below displays the necessary hardware for its installation.
Objectives
The primary objective of this project is to eliminate incoming advertisements from appearing on my computer devices. Such devices would consist of my LG Smart TV, iOS Devices, and Windows based PCs. The secondary objective is to increase network privacy & block any unnecessary device tracking.
An image of the components used for this project. Eithernet cable, SD Card, SD Card Reader, Raspberry Pi Zero, Micro B/Eithernet Adaptor, Micro B Power Supply.
Pi Zero Setup
First, I navigated to RaspberryPi.com/software/ to download and install the Raspberry Pi Imager. This imager is what I will use to install Raspberry Pi OS on to the MicroSD boot drive for the Raspberry Pi Zero. Next, I connected the MicoSD card to my PC using my SD Card Reader and then launched the Imager to begin the Raspberry Pi OS installation. For my needs, I had set up a password & enable ssh (Secure Shell Protocol) which allows remote login-in/access to the Pi-Hole.
A screenshot of www.raspberrypi.com/software/Raspberry Pi OSA screenshot of the Raspberry Pi Imager
Network Connectivity
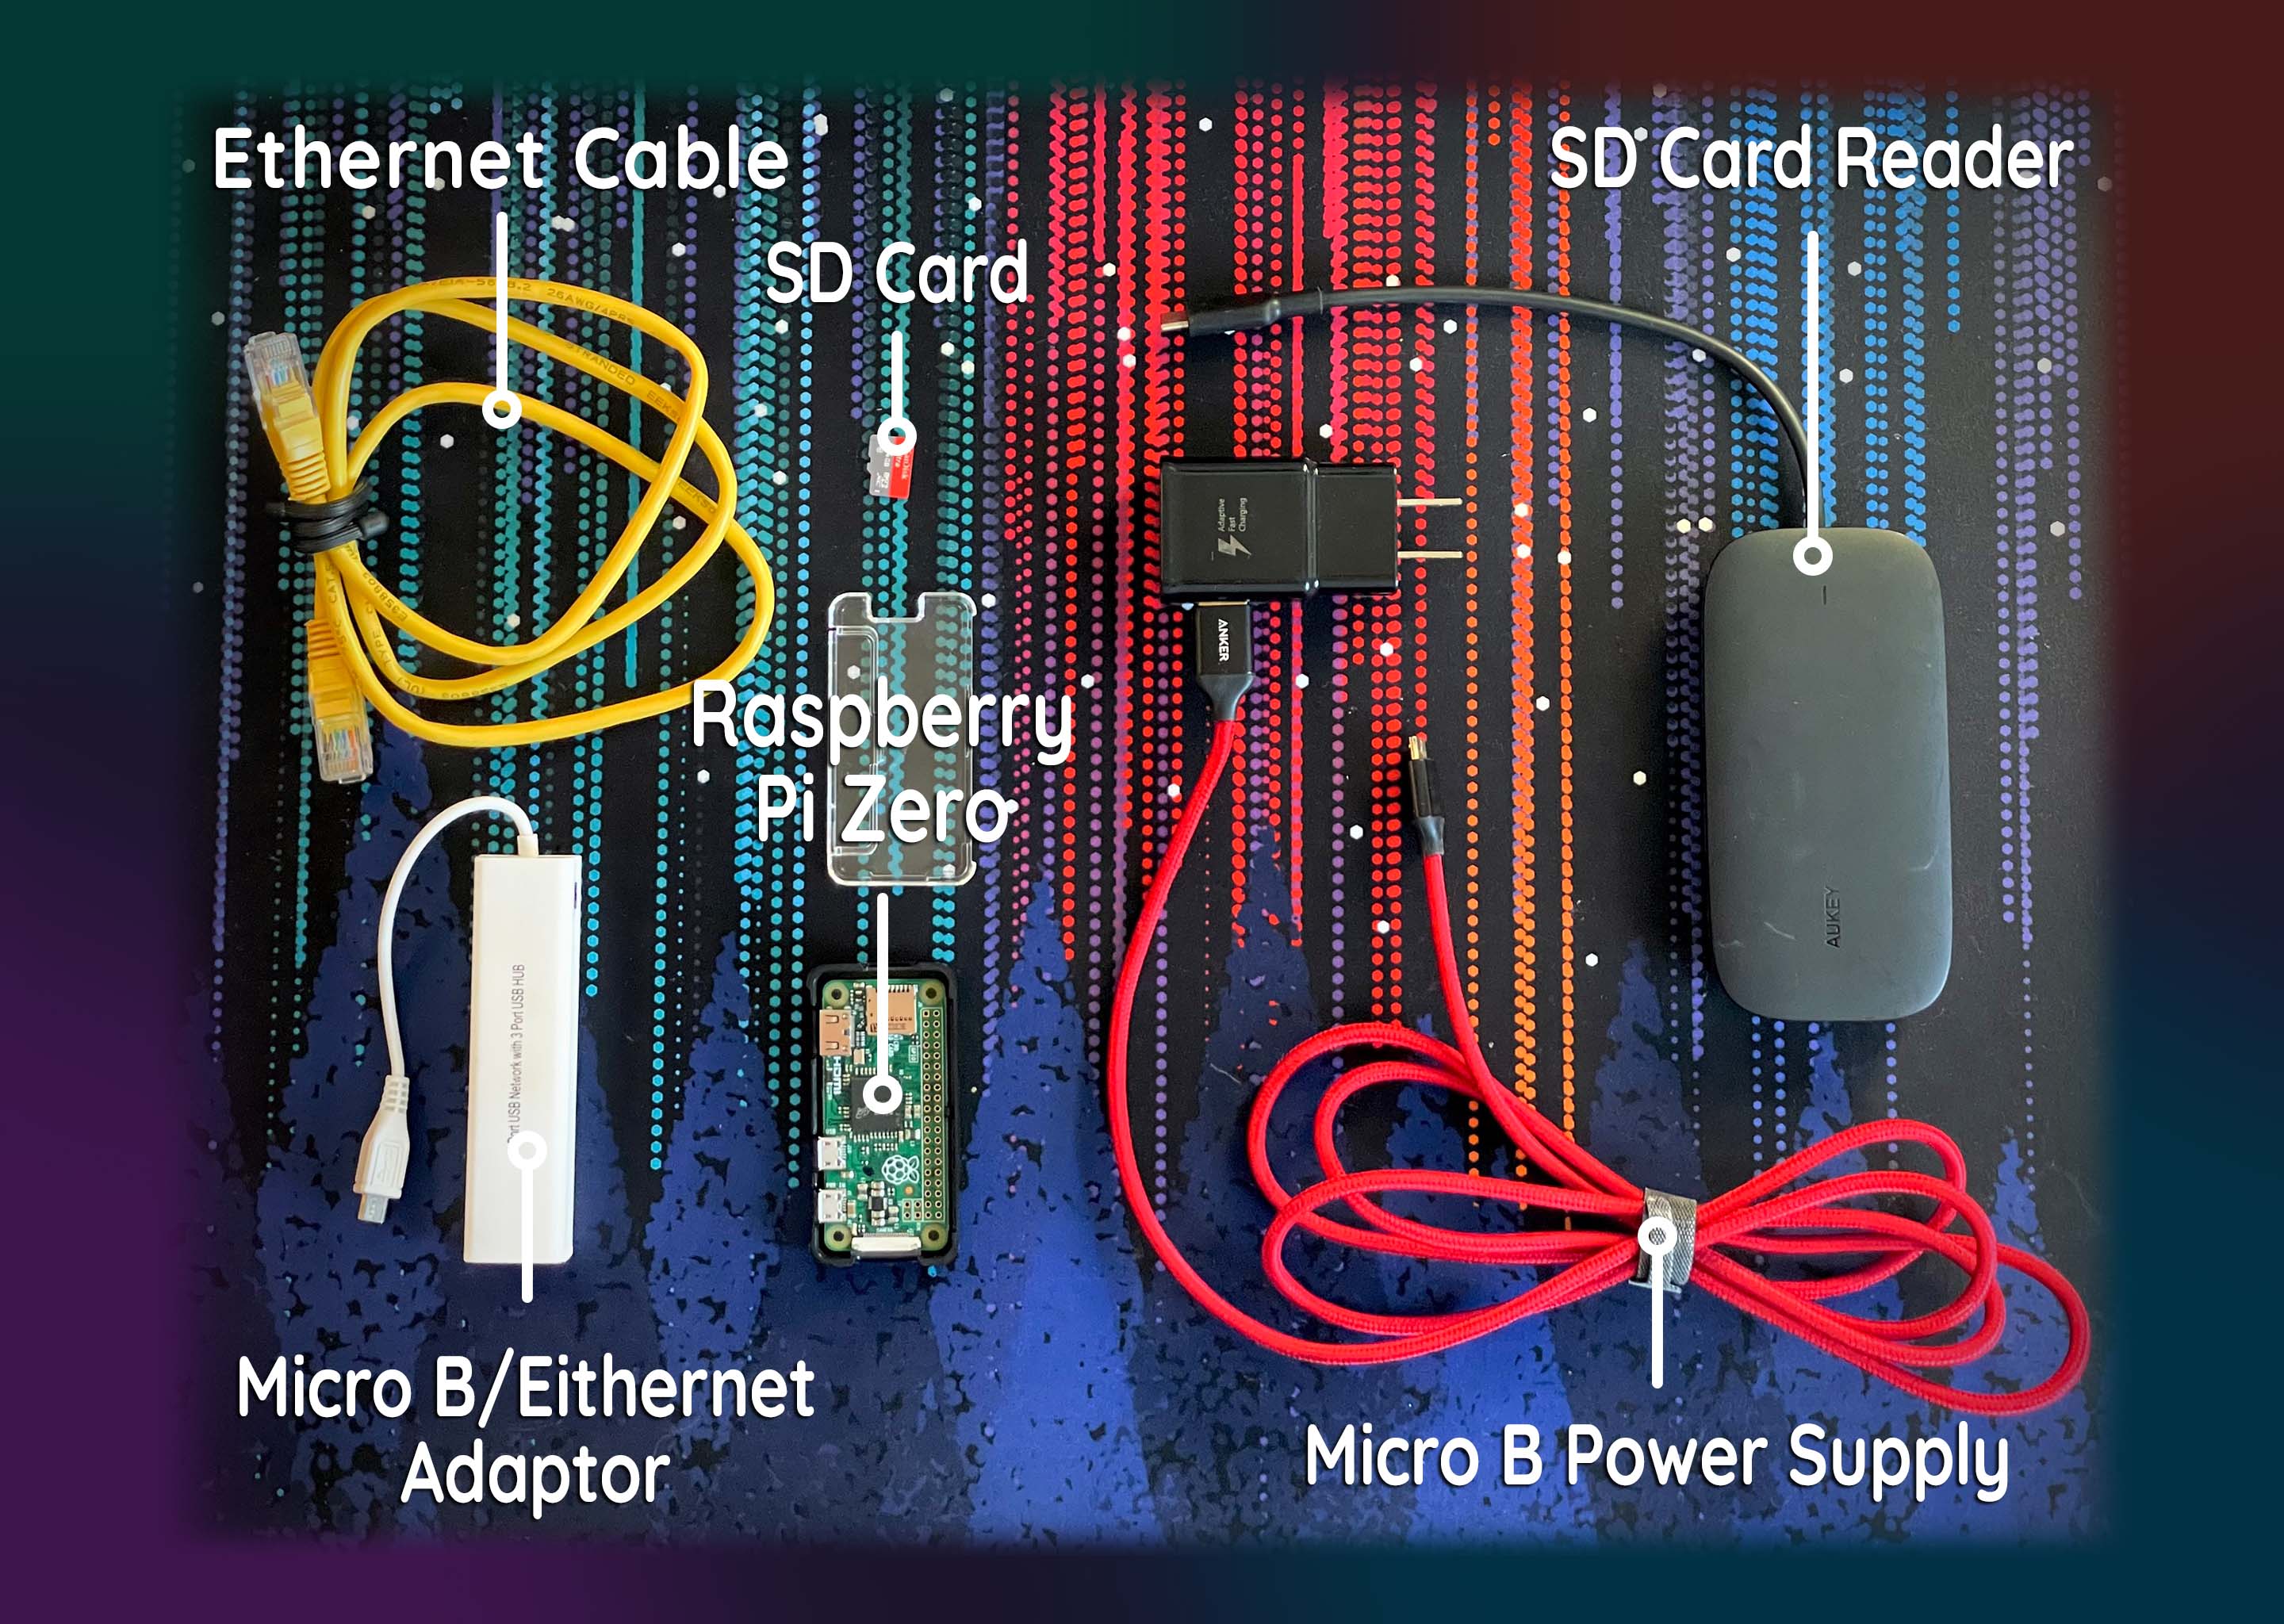
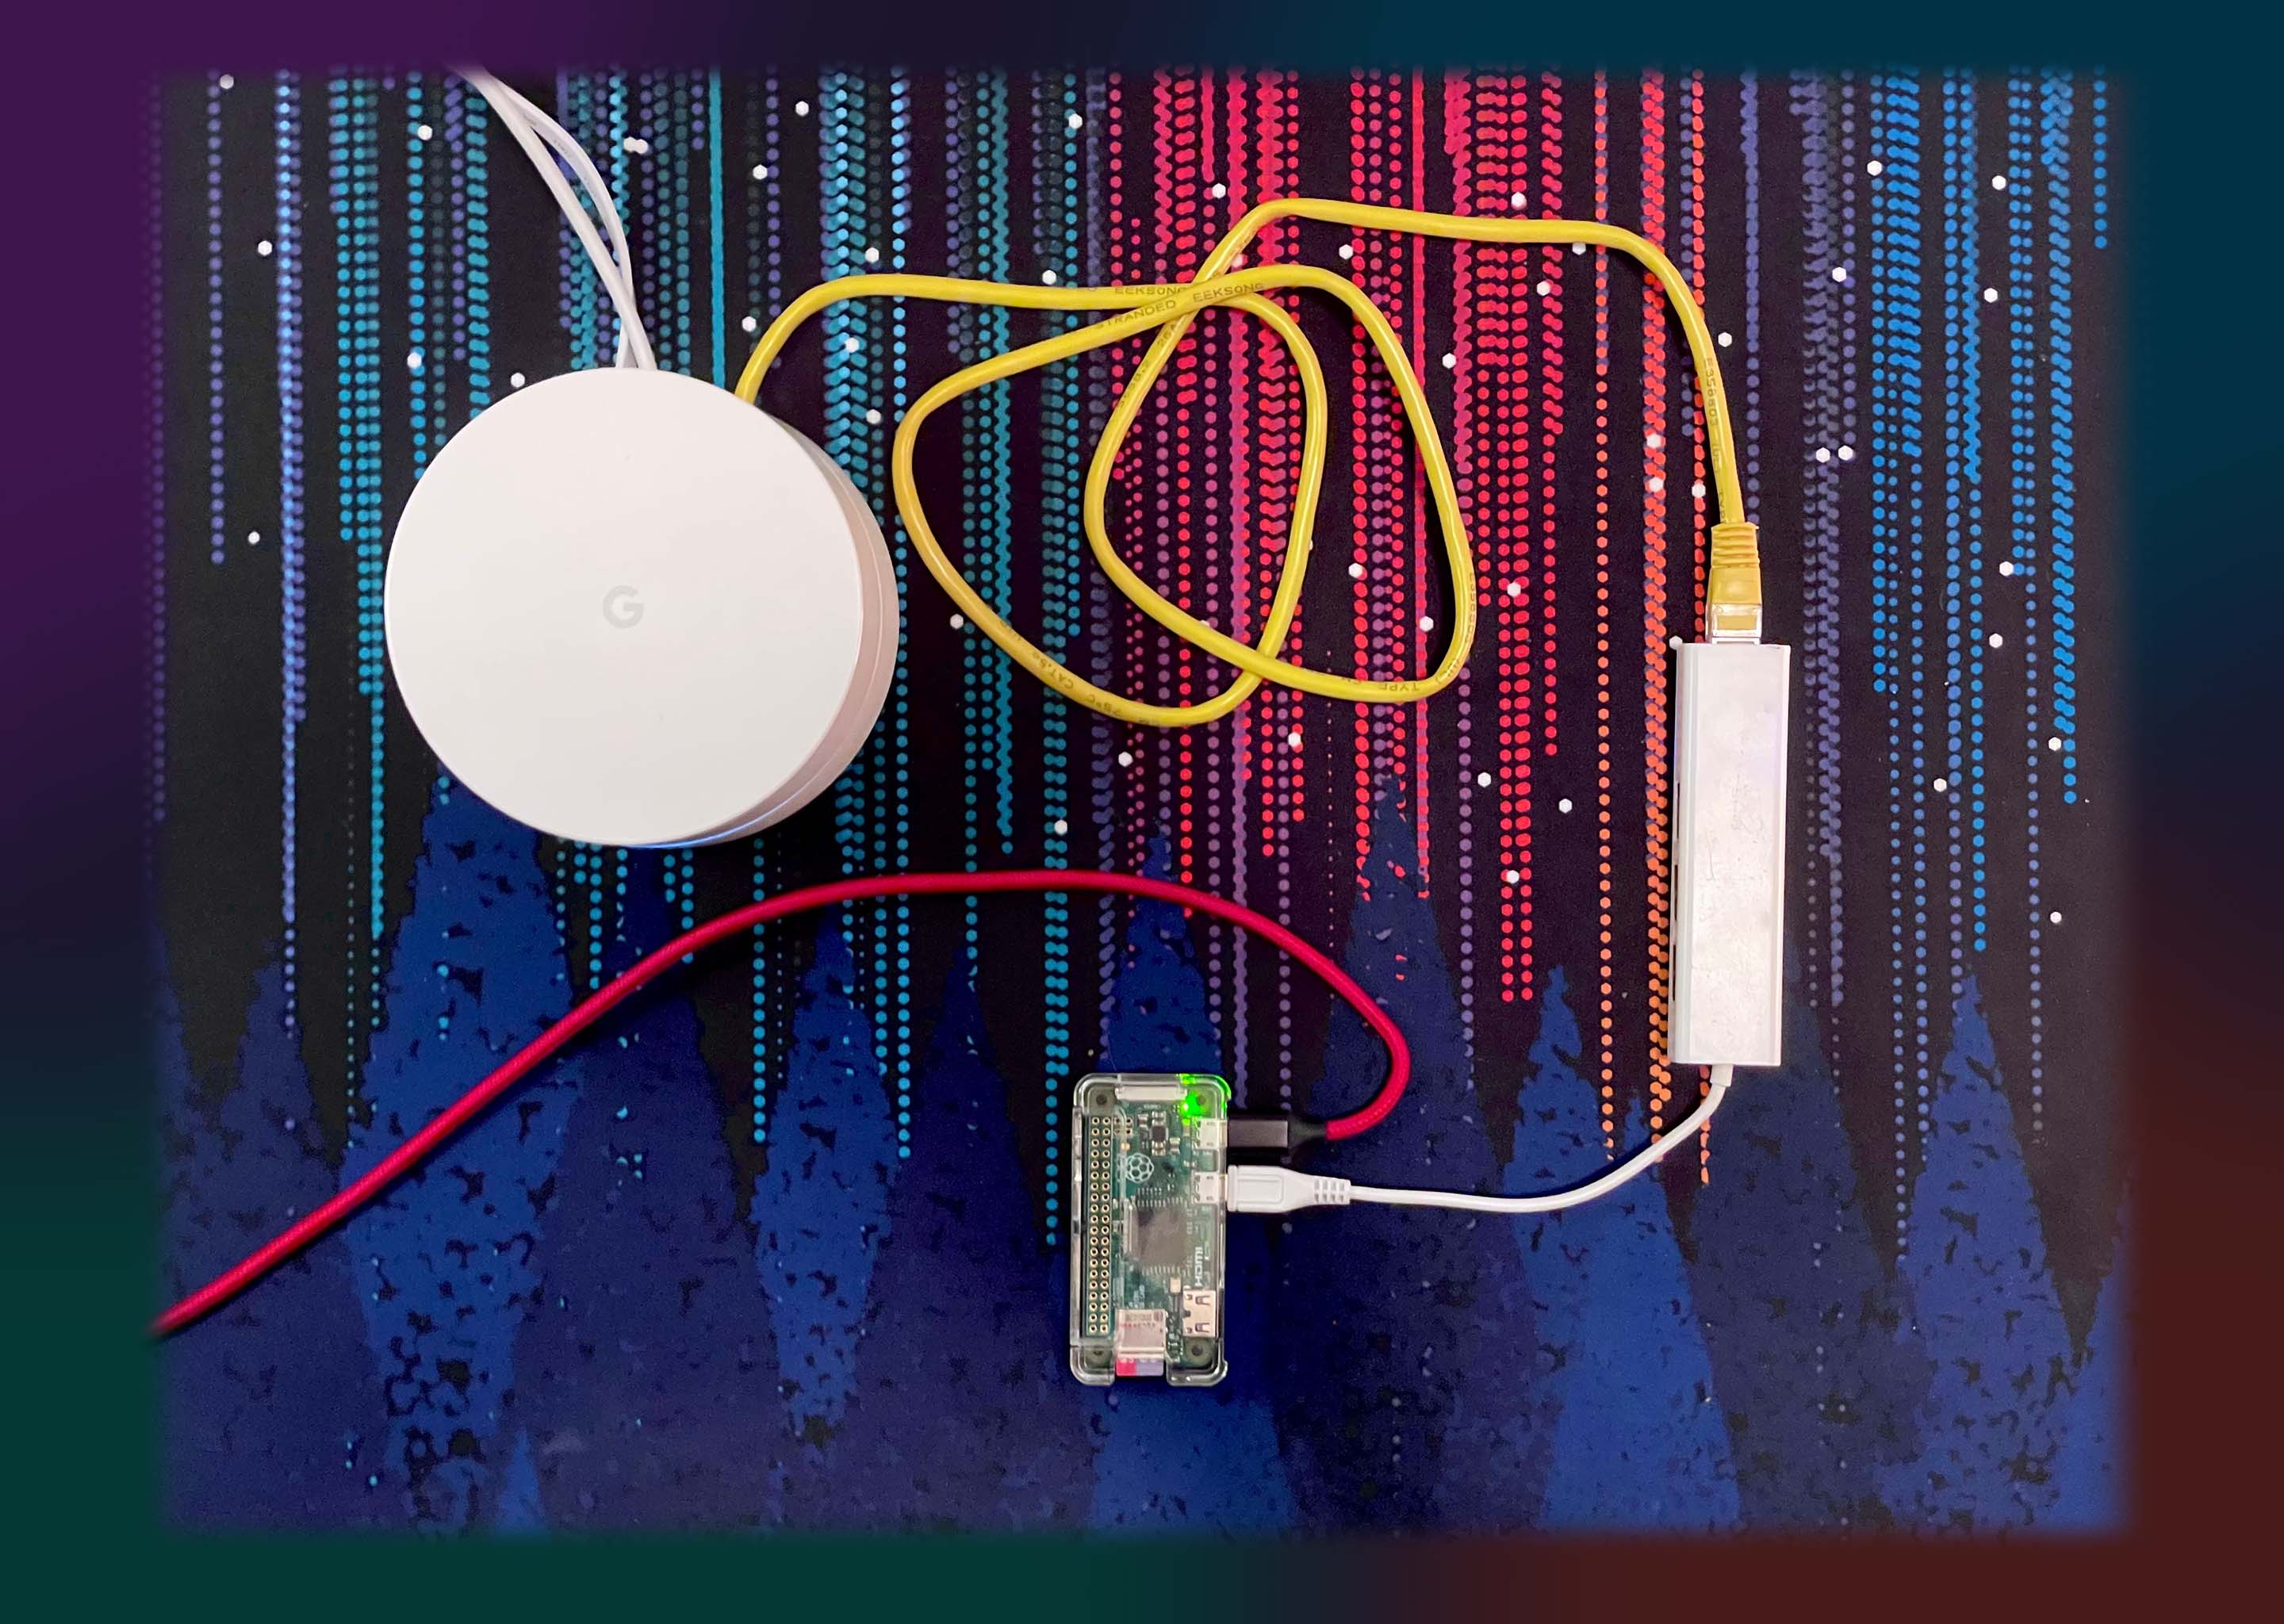
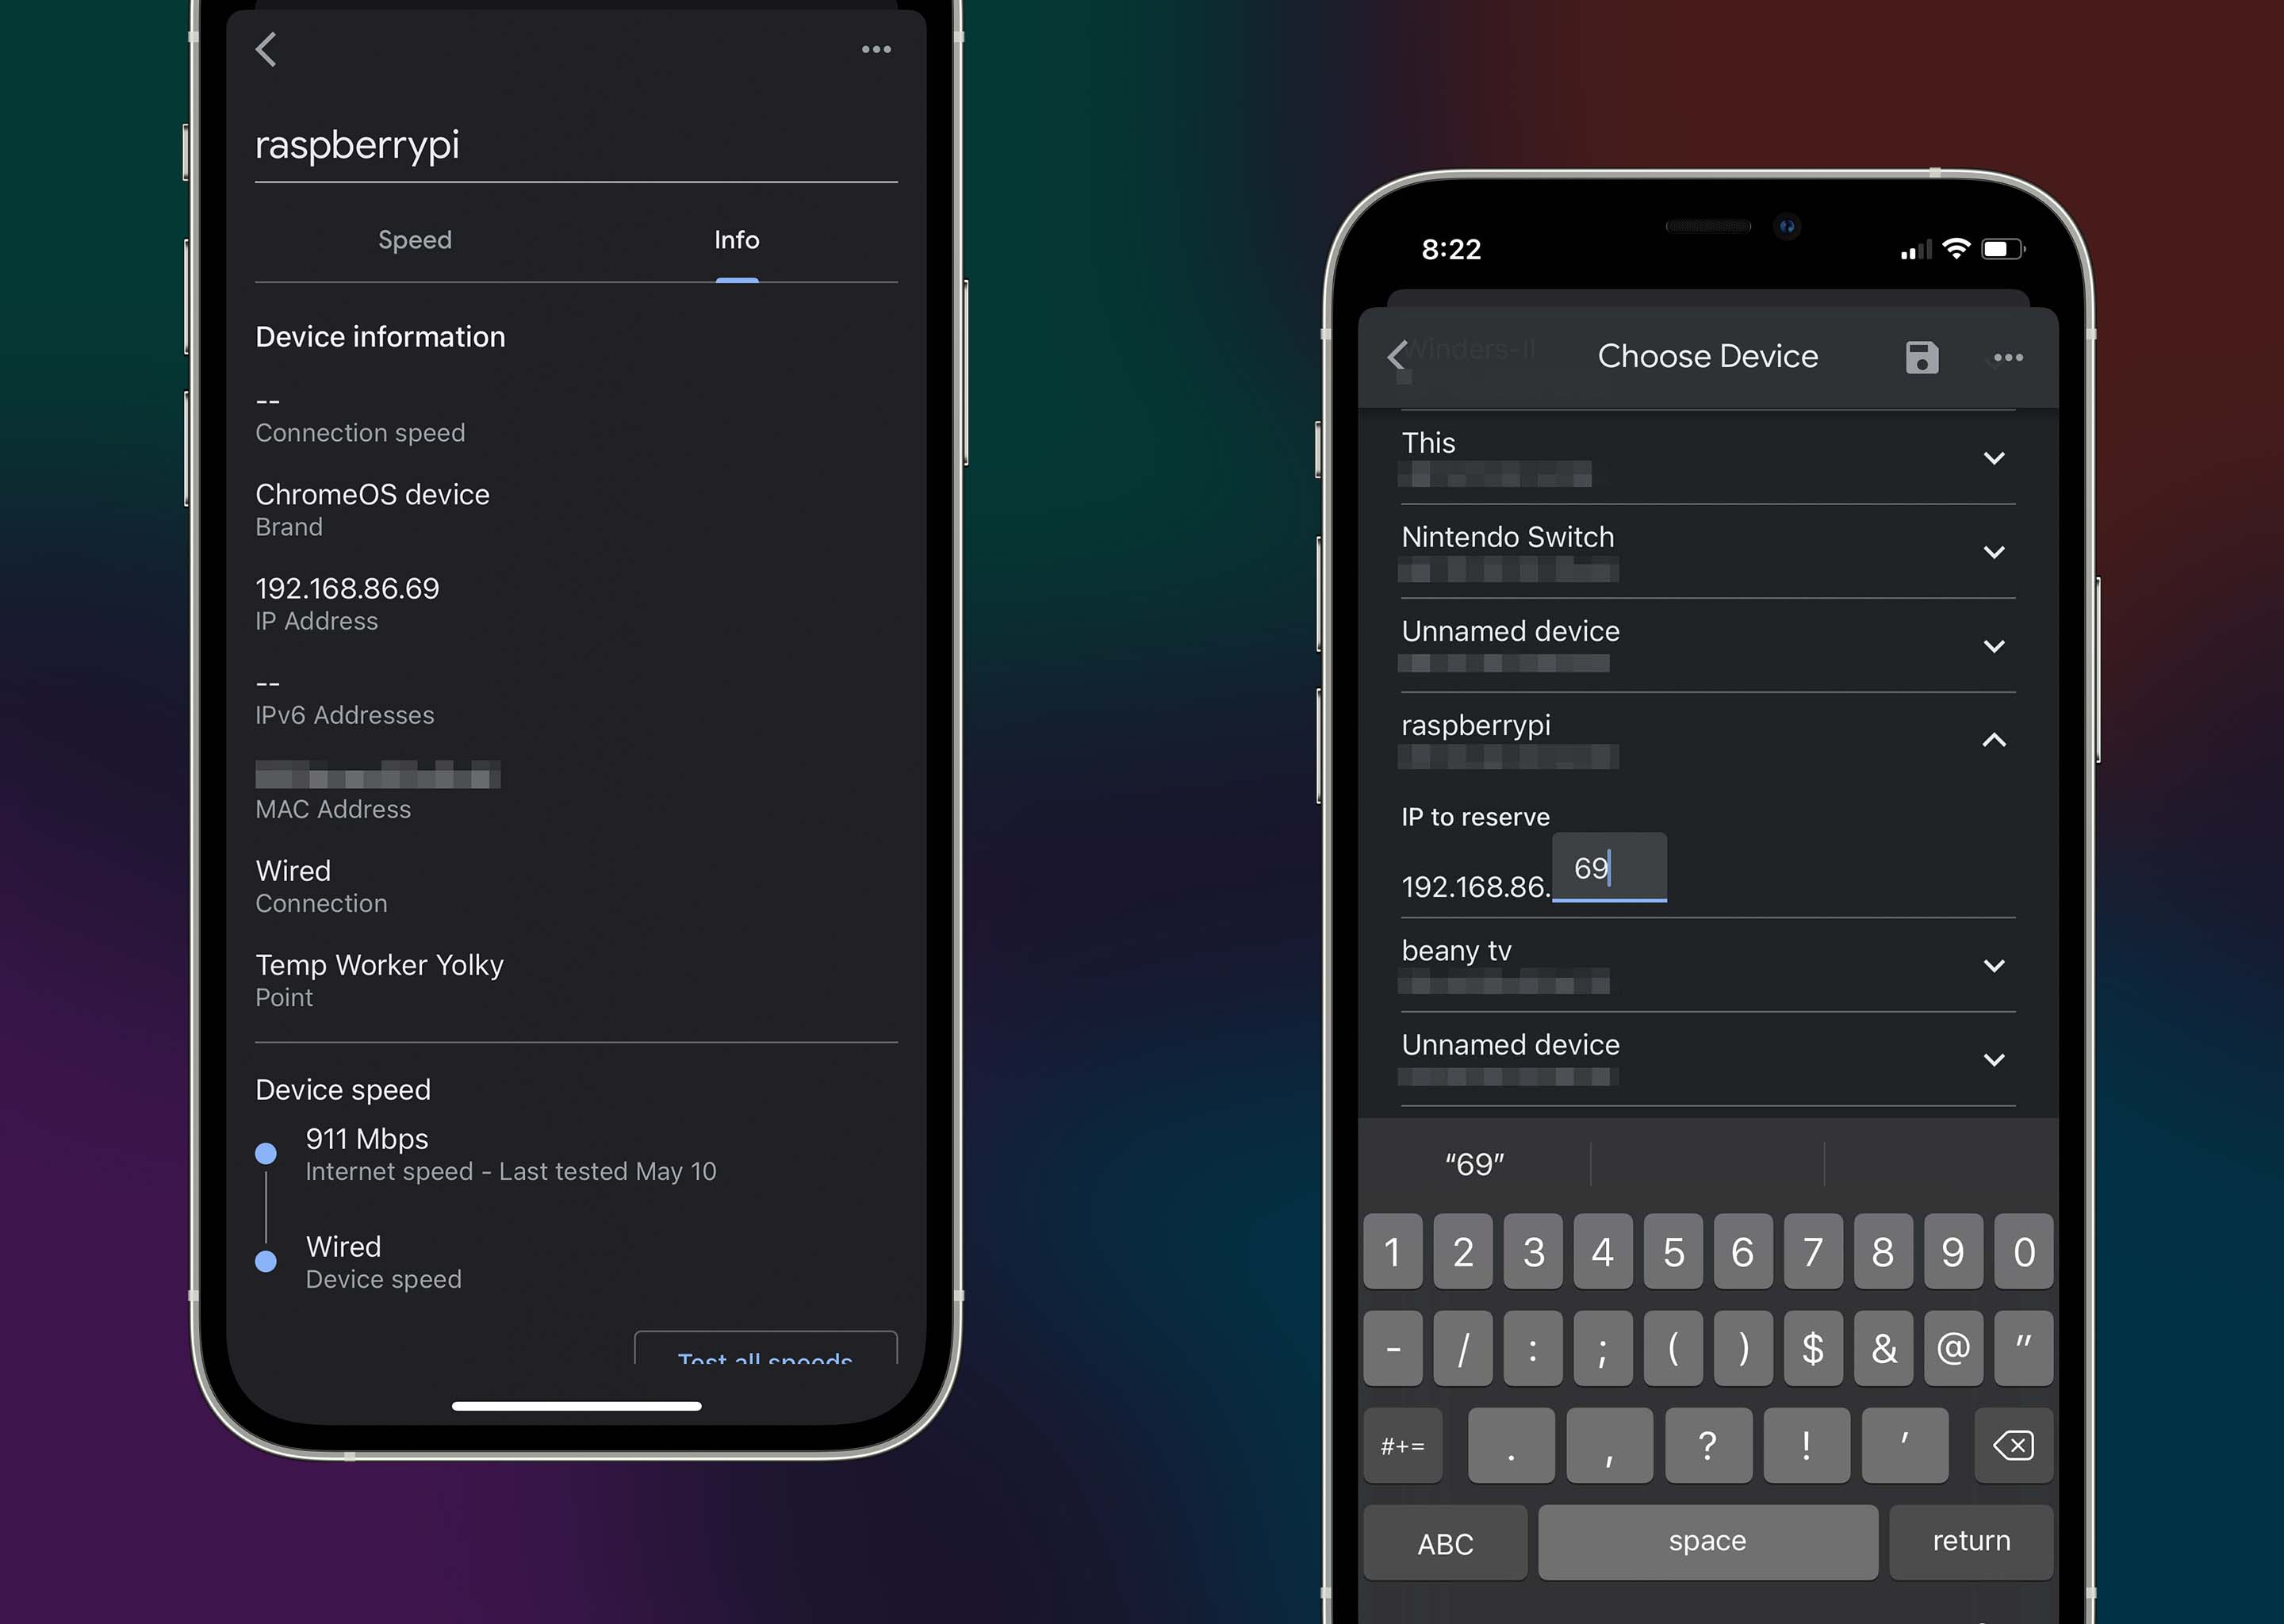
To connect the Pi Zero, I utilized a Micro-B/Ethernet adaptor cable, since the Pi Zero lacks built-in network connectivity. As seen in the photo below, the Pi Zero is connected directly to the Google Home Router via its Gigabit LAN Port. To ensure that the device is set up correctly, I inspected the network connected devices in my Google Home app.  While in the app, I also set the Pi-Hole’s DHCP IP reservation to: 192.168.86.69 for my home network.

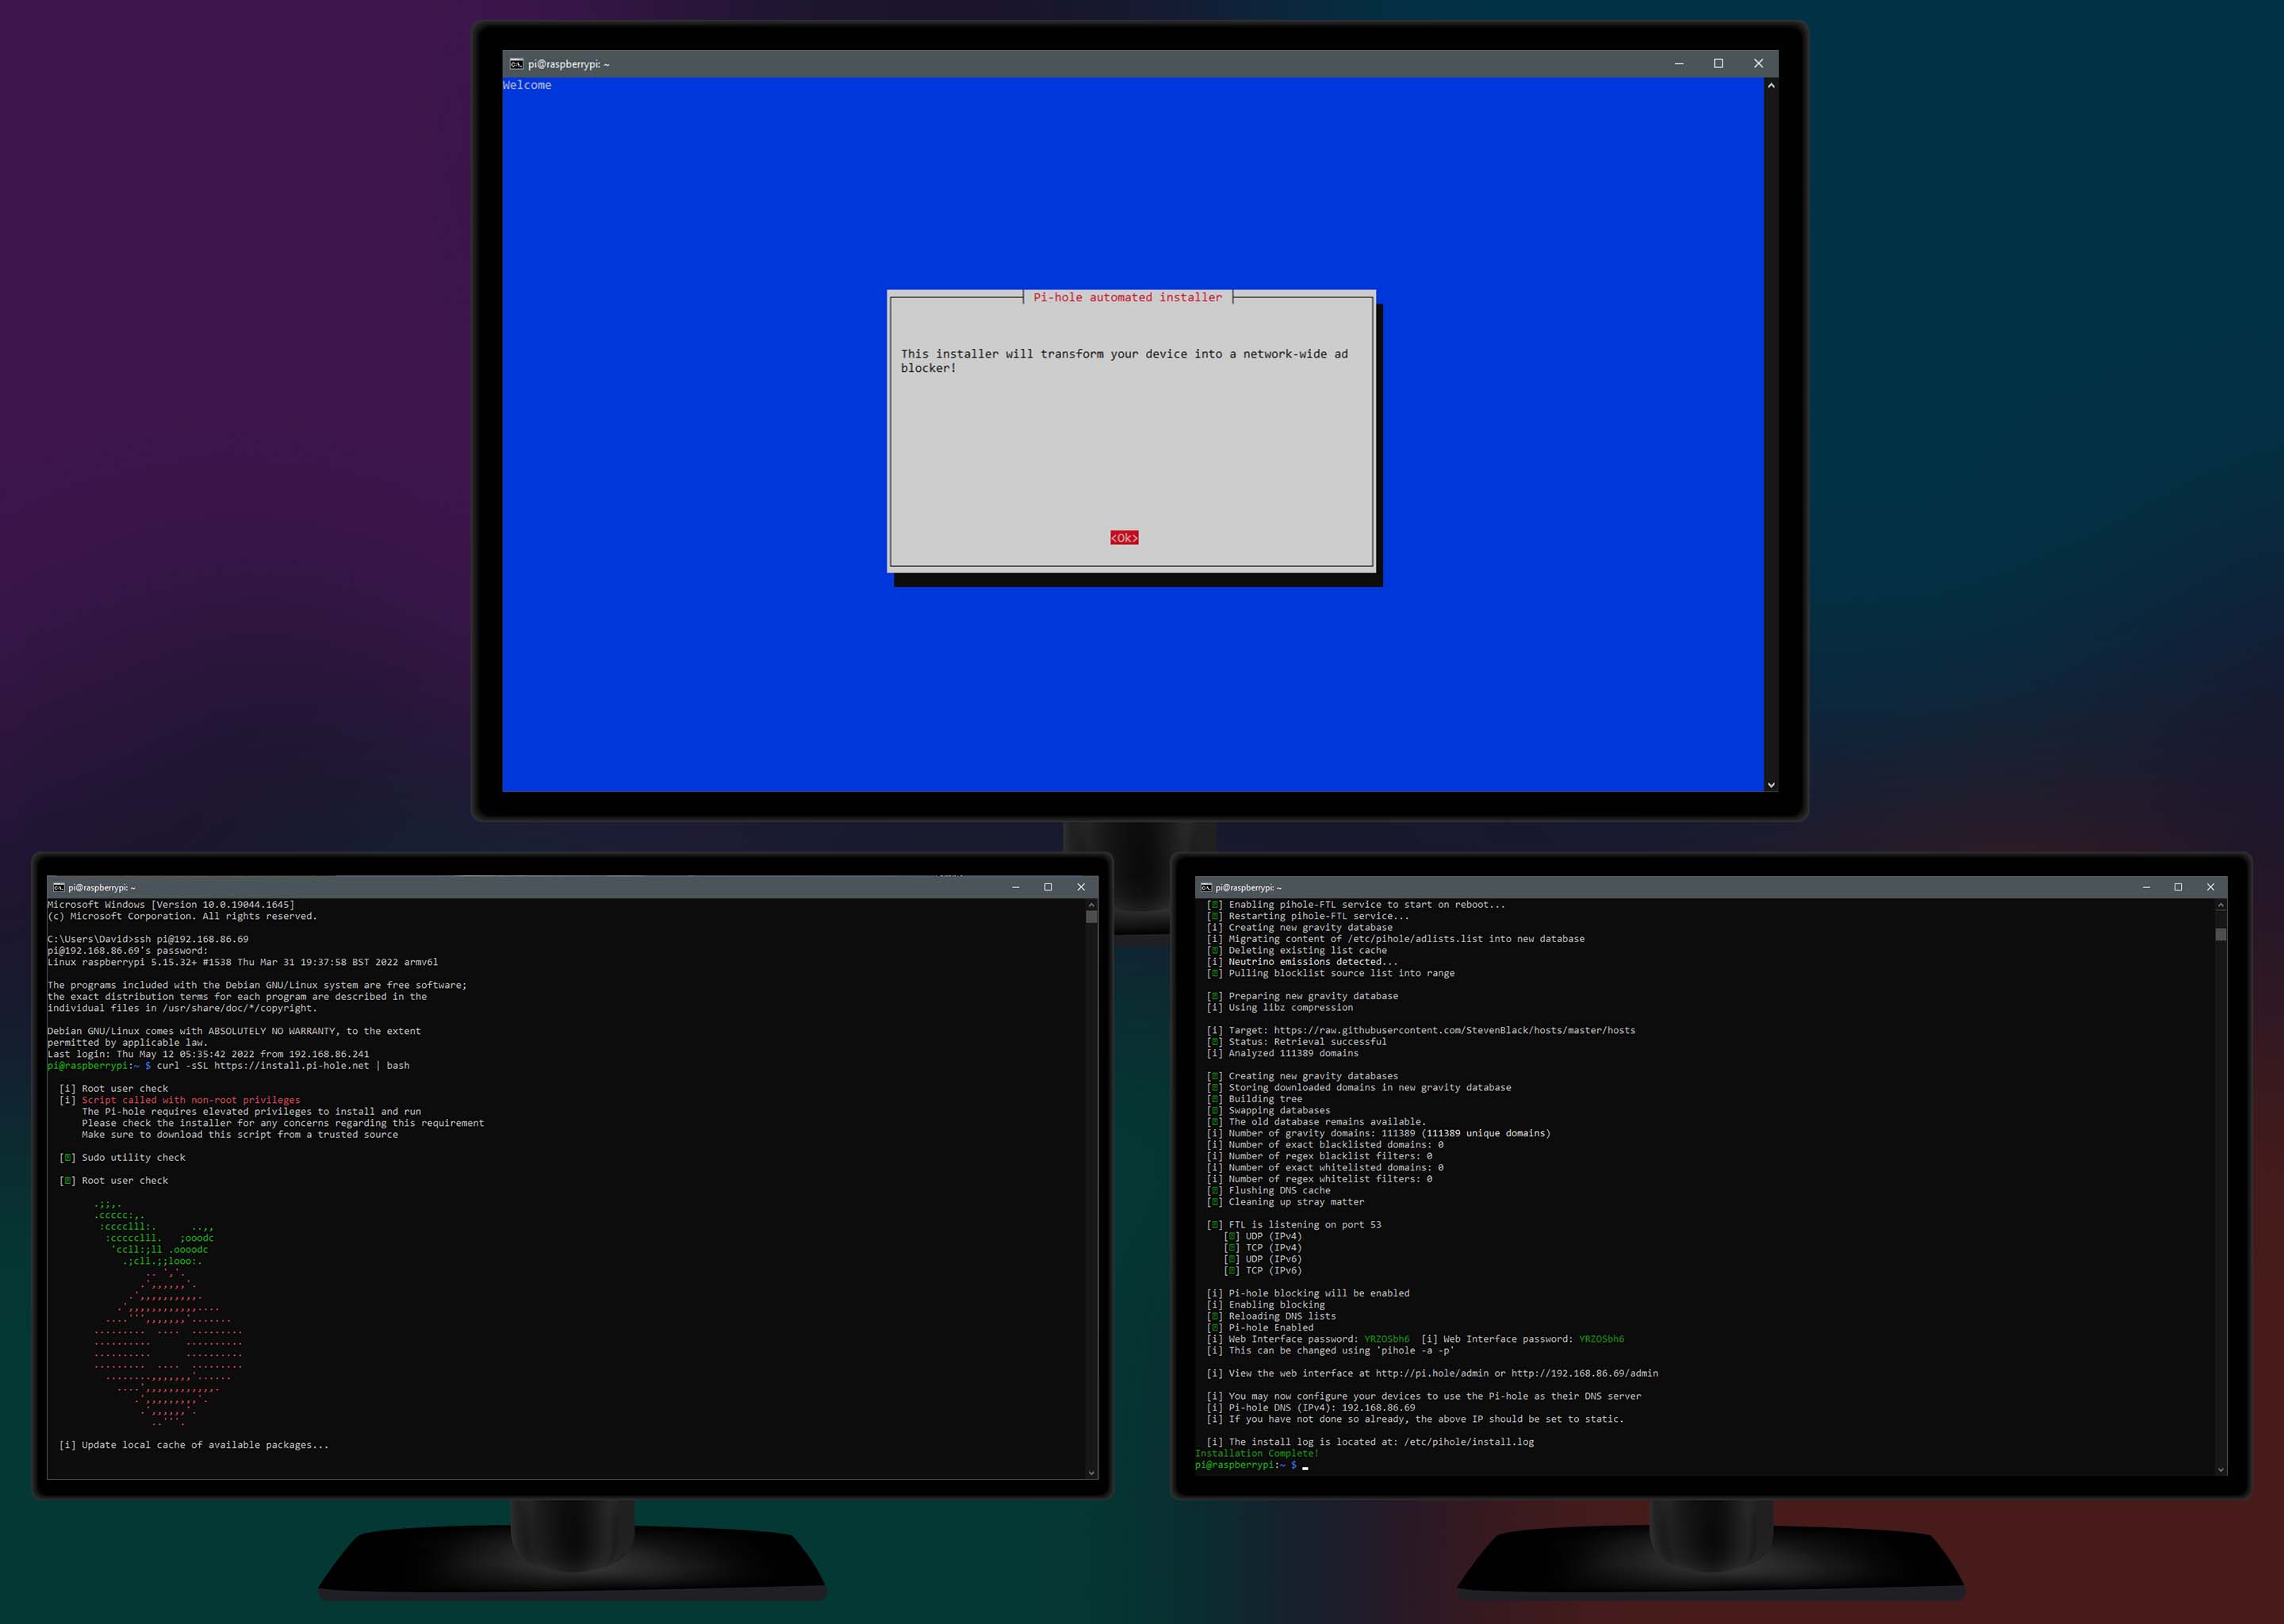
Once that was completed, I returned to my PC and proceeded to remote login into the Pi-Hole using the following command: ssh pi@192.168.86.69 and was prompted to enter a password. After this, I entered a command which will install the Pi-Hole: curl -sSL https://install.pi-hole.net | bash. During this process, some installation prompts will appear. For my purposes, the default options for all installation settings are fine.
A Google Home Router connected via Eithernet to the Raspberry Pi Zero.2 screenshots of the Google Home app. It shows the Raspberry Pi is connected to the network, and it shows the IP reservation setting.3 screenshots of a terminal showing the Pi Hole's setup prompts.
DHCP Server
In terms of network setup, there are two options with the Pi-Hole: 1) DHCP server or 2) DNS server. I chose the DHCP server due to client tracking errors I received while using DNS, though for most use cases both options will function similarly. First, I set the DCHP Pool start & end to the Pi-hole’s DHCP IP reservation: 192.168.86.69. Then I enabled the DHCP server option for the Pi-Hole though its admin panel, which I accessed by typing the following into my browser’s search bar: 192.168.86.69/admin/. Then I navigated to the DCHP setting, and check the DHCP server enabled box.
2 screenshots. One is of the Google Home app showing the Router LAN IP settings & DHCP Pool. The other is showing the Pi-Hole's DHCP settings.
Conclusion
The Pi-Hole performs as expected, with network traffic showing reductions of 9% – 14% (depending on queries severed).
Advertisements have drastically reduced on network connected devices; primarily on iPhones and the LG Smart TV.
A screenshot of the Pi-Hole's dashboard.
^ Back to Top ^